- How do I join a virtual visit?
Please click here for detailed information directly from Telus Health on how to join a virtual visit with your health care provider https://help.inputhealth.com/en/articles/6912869-attending-virtual-visits-through-telus-chr-connect-for-patients
- My health care provider asked me to send a photo (picture) related to my medical issue. What is the easiest and most secure way to do this?
You can call the clinic at 613-564-3950 and speak to a medical receptionist or leave a voicemail message indicating the reason for your call.
Don’t forget to include your first and last name, date of birth and email address.
The receptionist will send you a message, with a secure link, that will allow you to upload the photo directly to your health record.Note: Your health care provider will only see the photo at the time of the scheduled visit. Providers are not expected to respond to these photos until a clinical context is provided at the visit.
- I'm having an issue with a my Virtual (video) appointment. What should I do?
Please click here for detailed information directly from Telus Health on how to troubleshoot a virtual visit with your health care provider: https://help.inputhealth.com/en/articles/7052961-troubleshooting-telus-chr-connect-virtual-visits-for-patients
Did not receive the access code
Approximately five minutes before your scheduled virtual appointment you will receive an automated notification with your virtual visit access code. Please ensure that we have your current email address on file and that you can access your email account before the session starts.
Code is not working
The code you receive is case sensitive. If you are still not able to access, one of our medical receptionists can resend you a Virtual Visit code by calling us at 613-564-3950.
Video (and/or microphone) is not working
Please make sure that you have enabled video on Google Chrome settings.

Camera Access Denied error message
Make sure that all other applications that utilize the camera on your computer have been closed. If you are still encountering the error message, please restart your computer.
Receiving a strange error when attempting to log in
Please make sure that you are entering your name and other required demographic information exactly as it appears in your file.
- I have a Virtual (video) appointment scheduled with a health care provider. Is there anything I need to do to prepare?
Virtual Visits – Tips For Patients
For Virtual Visits to function well for both you and the practitioner, ensure the following has been set up prior to beginning your virtual visit:
-
Laptop or computer – ensure that you are using the latest version of Google Chrome.
-
Mobile Device (cell phone or tablet) – ensure you download the TELUS CHR Connect mobile app from the Apple App Store or the Google Play Store.
-
Android devices – Android devices – ensure that you are using Android 7.0 or later.
- iPhone and/or iPad (iOS device) – ensure that you are using iOS 13 or later.
-
Close all other applications that may use your camera (i.e. Zoom, Skype, Facetime, Teams, Hangouts, GotoMeeting).
-
Before starting a virtual encounter, close all other programs on your computer/device to prevent them from making your computer/device slower during the session.
-
Prior to starting a virtual encounter, ensure that you are connected to a stable Internet connection. Your upload and download speed should be at least: 5-10mbps. Click here to assess your internet speed: http://www.speedtest.net/.
-
Refresh your screen if you encounter any error messages.
-
Ensure you are connected to audio and video on both sides before starting the session. Sometimes your Google Chrome browser settings will block audio/video sessions—make sure your permissions are turned ON for your camera and microphone. Click here for more information on how to adjust your Google Chrome camera and microphone permissions.
-
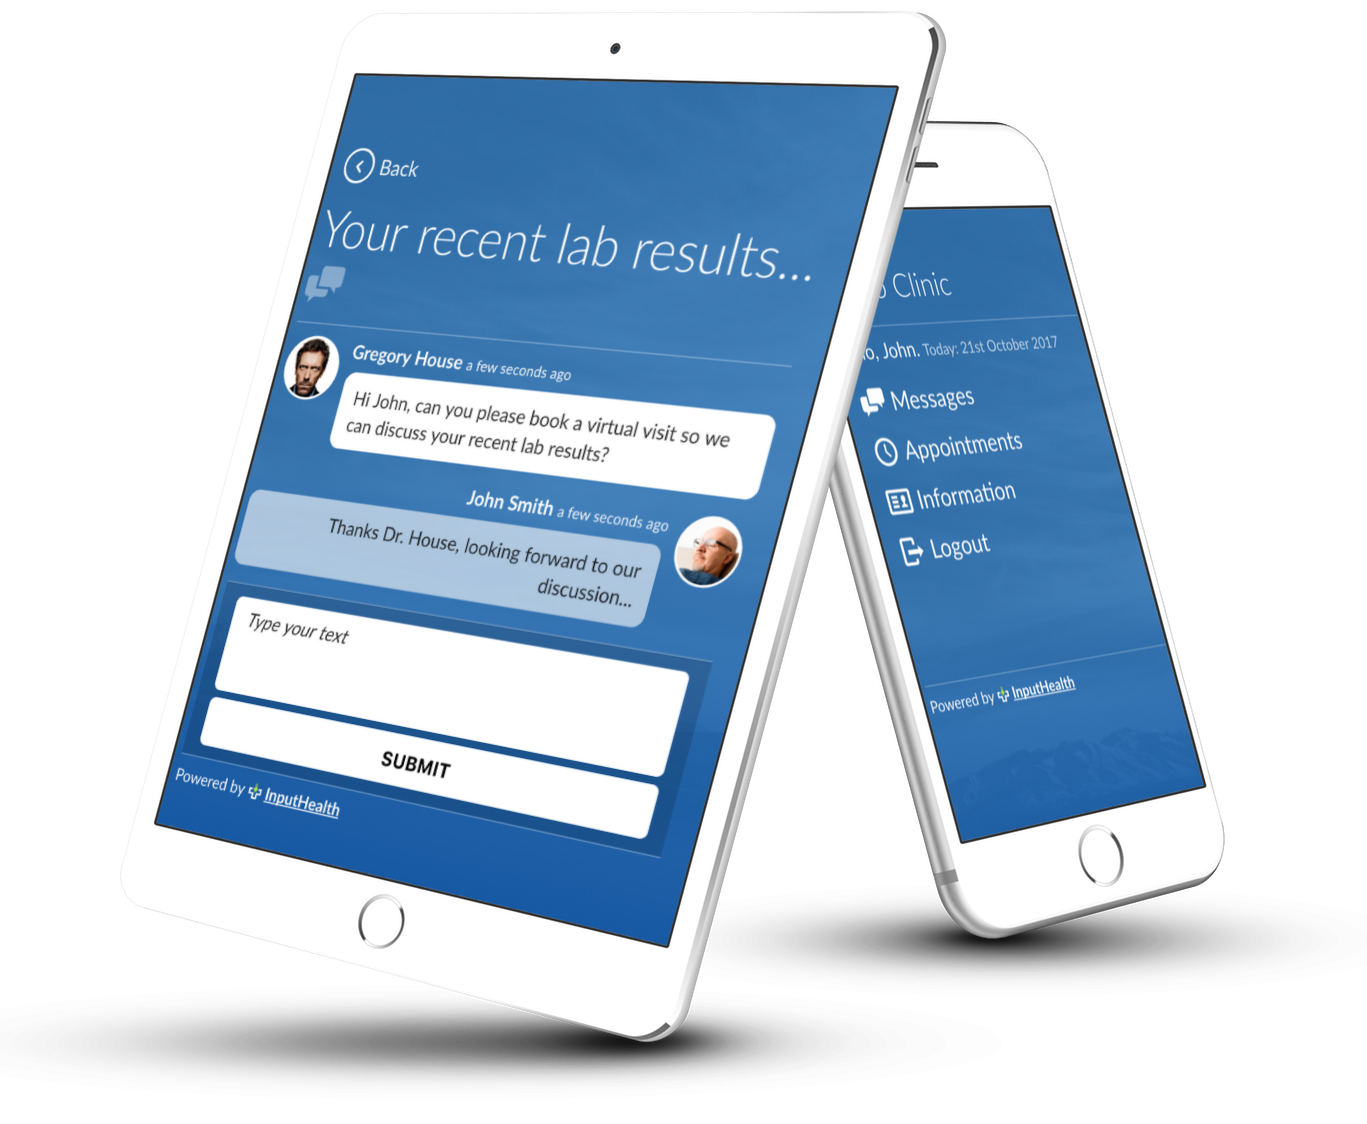
- How do I navigate the patient portal?
If you have logged into the patient portal by clicking on a link in an email or SMS notification, you initially land on the patient portal message page and see the message sent by your clinic (with or without the option to reply).

? Tip: To navigate to the patient portal home page, click < Back at the top left corner.

Home Page
On the patient portal home page, you can access messages, appointments, and your demographic information:

Messages
Click Messages to view old or new messages.

Click on a specific message to view details.
Reply to a message:
-
Type text in the white message box.
-
Click Submit.

Appointments
Click Appointments to view old and upcoming appointments.
Click + New Appointment to request an appointment.

Click on a specific appointment to
-
View appointment details.
-
Change appointment time.
-
Cancel appointment.
-
Complete Pre-visit tasks.

Billing
Click to view any outstanding private bills and to make payment using your credit card. See Making a credit card payment using the patient portal (for patients).
? Note: Not all clinics have this feature enabled.
Information
Click to view your demographic information.

Update your information:
-
Click in the box that you would like to update.
-
Type updated information.
-
Click Update.
This will immediately update the information in your patient chart.
Logout
Click Logout to log out of your patient portal.
Updated: June 15, 2021
-
- My access code has expired. How do I get a new code?
Access codes expire after 3 days and can only be used one-time. If you click on a notification link that leads to the patient portal and the passcode has expired, you should see the screen below.

Patients have the option to press the Resend Quick Passcode button. This will send another code to your preferred notification method (email or SMS). Using the new access code, you will now be able to access the message associated with the original notification you received.
Patients can also login to the patient portal using another method, by pressing the the Continue to Login button.

-
-
Click CONTINUE TO LOGIN
-
Click the Identification field.
a. Under ID type, click the arrow and select one.
b. Enter ID Number and/ or code (this is usually your health card number). -
Click the Email or Phone field.
a. Select either Mobile or Email.b. Enter mobile number or email address.
-
Click Apply.
-
Click Next.
A new page appears.
-
Check your messages (email or sms) for a new OTP.
-
Enter the new OTP in the One time passcode field.
-
(Optional) You can select the checkbox next to Stay logged in. You will remain logged into the patient portal for 30 days.
-
Click LOGIN.
-
- • For Patients: Login to Patient Portal after Passcode Expiry: https://help.inputhealth.com/en/articles/1575846-for-patients-login-to-patient-portal-after-passcode-expiry
• For Patients: Login to the Patient Portal: https://help.inputhealth.com/en/articles/1575581-for-patients-login-to-the-patient-portal
-
- How do I access a message (in the patient portal) using an email or text (sms) message link?
- Open the email/ SMS notification that you received.
From the email, click Read Message (in the case of sms, click on the specific link).
 A new page opens.
2. Enter the one time password (OTP) you received in the email / text (sms) notification.
⚠️ Important: The OTP expires after:
- Five incorrect attempts. See Accessing the patient portal after passcode expiry.
3. Enter your date of birth
4. (Optional) You can select the checkbox next to Stay logged in to remain logged in for 30 days.
5. Click LOGIN.
A new page opens with the portal message displayed.

? Note: Some messages may not allow the patient to reply or this option has been disabled.
- How do I access the patient portal?
You can access the patient portal from a link sent to you via email or SMS message, or directly from a URL in your web browser.
Steps (to access the patient portal from your web browser)
-
Enter the URL address unique to your clinic, usually in the format,
https://opih.inputhealth.com/portal#login

-
Click the Identification field.
A new window appears.
-
From the ID Type list, select the ID you want to use to identify yourself, enter your ID number/code in the filed that appears and then click Apply.
The main patient portal page appears.
-
Click the Email or Phone Field.
A dialogue window appears.

-
Under Contact, select either Mobile or Email.
-
Under Number / Email Address, enter your email address or mobile number.
? Note: These details have to match the ones the clinic has on record. -
Click Apply.
-
Click Next.
A new page opens.

-
Check your email or SMS text message for a one time passcode (OTP).
? Note: If you do not see a message immediately, wait a few minutes. Alternatively check your email spam folder.
-
Once you have received the OTP, enter it in the One time passcode box.
⚠️ Important: The OTP expires after:
- Five incorrect attempts.
Optional: You can select the checkbox next to Stay logged in. You will remain logged into the patient portal for 30 days.
11. Click LOGIN.
The patient portal home page opens.

-
ByWard Family Health Team uses the Telus Health CHR (Collaborative Health Record) that allows patients to take a more active role, reducing the time required on administrative tasks and making clinical interactions more efficient.
As a patient you will notice many benefits of the CHR:
- Receiving appointment reminder & rescheduling notices by email or SMS or both.
- Booking a virtual visit with your provider
- Completing electronic questionnaires prior to the appointment. Once completed, these questionnaires are automatically uploaded to your patient record.
- Receiving communications from your provider via the TELUS Collaborative Health Record (CHR) Connect app.
- Access to your provider’s availability when requesting an appointment online
To support patients and facilitate the transition to a more collaborative health care experience, below are the answers to some of the most frequently asked questions.